L’huile moteur d’un camion est comme le sang qui nourrit le cœur du moteur ; les vidanges régulières sont donc extrêmement importantes pour les moteurs de camion. Des vidanges correctement effectuées prolongent la durée de vie du véhicule, garantissant un fonctionnement fluide et efficace avec moins de pannes.
Signes indiquant qu’il est temps de changer l’huile moteur de votre camion
Trucks need an oil change after a certain period of use, when the engine oil turns brown or black. This indicates that your oil is functioning properly.
Due to the engine cylinders generating a lot of heat and dirt, truck oil helps dissipate heat and reduce friction. Because the oil also contains components that clean the friction surfaces of the engine, dirt and deposits are retained within the oil. If your oil changes color less than usual, it means the oil is not retaining dirt and is not cleaning the engine effectively.
Quand faut-il changer l’huile du camion ?
Depending on the mechanic or mechanic, changing the oil every 3000km, 5000km, or even 10,000km is usually recommended. The oil change interval is usually based on the manufacturer’s recommendations.
Comment effectuer correctement la vidange d’un camion
Changing truck oil requires several tools: jack stands, new oil and oil filter, wrench for the drain plug, oil filter wrench, oil collection bucket, a large piece of cardboard, an oil funnel, gloves, and a cleaning cloth. Once you have all the tools, you can begin changing the oil and filter.
Remarque : Si vous venez d’utiliser le camion, le moteur sera très chaud. Vous devez attendre environ deux heures avant de changer l’huile pour éviter les brûlures.
Étape 1. Vidange de l’huile moteur
First, park the truck on a hard, level surface. Raise the front of the truck and use jack stands on both sides to create enough space to crawl into the engine compartment to drain the oil. Be careful not to drain the oil while the engine is still hot, as the space under the truck is narrow and you could get burned by the oil splashing onto your body. Additionally, during the oil change process, you should also place a piece of cardboard on the floor to prevent oil from splashing.
Étape 2. Récupération de l’huile vidangée
Before removing the drain plug, make sure your drain container is correctly positioned along the drain line. If you place it incorrectly, the oil will leak out and stain the floor. Especially when removing the drain plug, quickly pull it out and hold it, or you can place a lid under the drain container to prevent the plug from falling into the oil container. Once all the oil has drained into the container, reattach the drain plug and tighten it just enough.
Étape 3. Retrait de l’ancien filtre à huile
Use the correct size oil filter wrench for your vehicle and remove it. After removing it, empty all the oil from the filter into the drain container and dispose of the filter in the correct waste bin.
Étape 4 : Remplacement du filtre à huile
Each vehicle has a different oil filter size, and you need to choose the correct filter for your vehicle model. Before installing the new oil filter, you need to apply a layer of oil around the rubber gaskets on the filter to improve sealing and make it easier to attach. Next, pour some oil around the rubber gaskets on the filter to improve sealing and make it easier to attach. Then, fill the filter with oil to about ⅔ of its capacity and attach it in place. Note that you need to keep the filter upright during installation to prevent oil leakage. Tighten by hand until it is firm, then use a filter wrench to tighten it until you feel sufficient torque. Do not overtighten the oil filter as this may break the rubber gaskets and make replacement more difficult later.
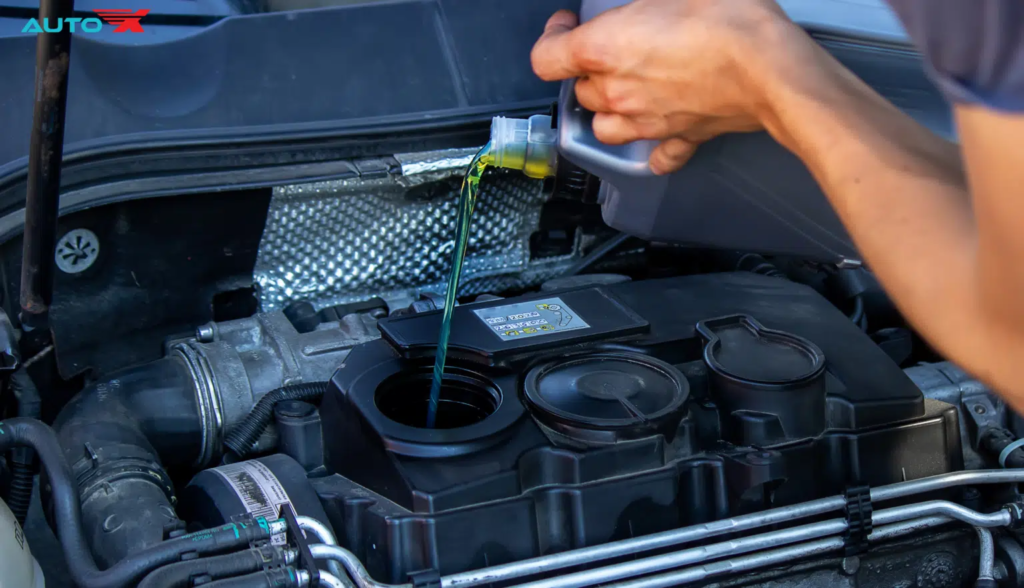
Étape 5. Ajout de l’huile moteur
Refer to your owner’s manual to find the engine oil level for your vehicle, then proceed to add oil. Open the oil filler cap and add oil. Note that you should add slightly less oil than the amount specified in the owner’s manual. For example, if the engine capacity is 5 liters, add 4.5 liters because there will still be some oil remaining in the engine parts that won’t drain completely when you drain it. After adding the oil, remove the dipstick and check the oil level. If it’s not enough, add more until you feel it’s sufficient.
Étape 6. Démarrer le moteur et réinitialiser le rappel de vidange.
After adding the correct amount of oil, we need to restart the car so that the engine parts and the entire system are lubricated. Then, reset the oil change reminder (depending on the car model, this may or may not be available). Please refer to the owner’s manual for instructions as each car has a different setting method.